| These are instructions on how to jailbreak your iPhone 3GS on iOS 5.0.1 using PwnageTool for Mac. Step One Make a folder called "Pwnage" on the desktop. In it, you will need a couple of things. PwnageTool 5.0.1, found here. You will also need the 5.0.1 iPhone firmware found here. When downloading the IPSW file, it is best to download it with Firefox since Safari often auto extracts it! 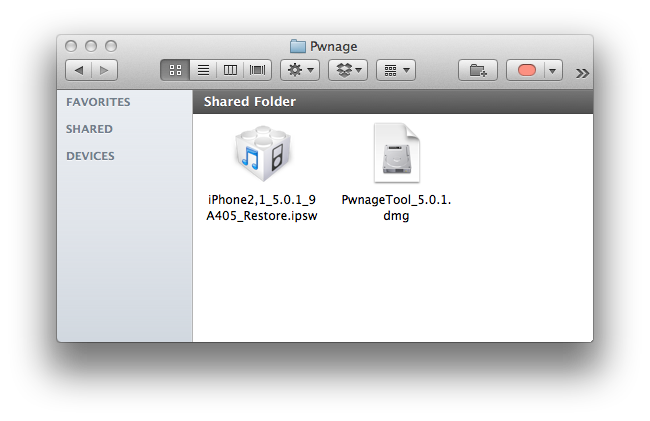 Step Two Double click to mount PwnageTool then drag the PwnageTool icon into the Pwnage folder. 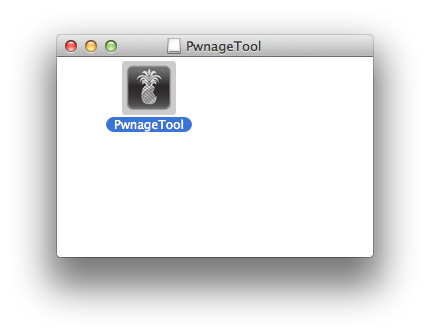 Then from the Pwnage folder double click to launch the PwnageTool application 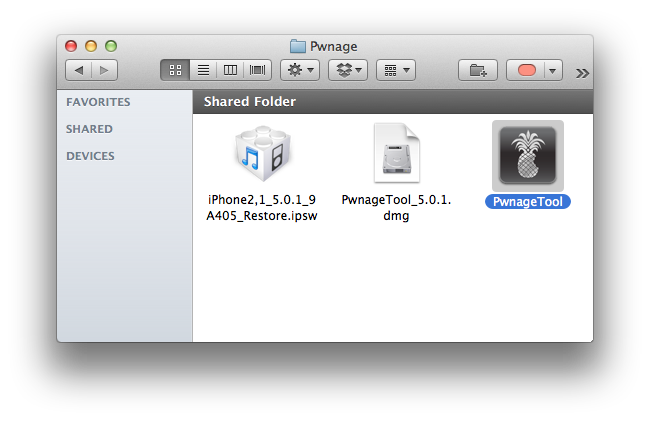 Click Ok if presented with a warning. 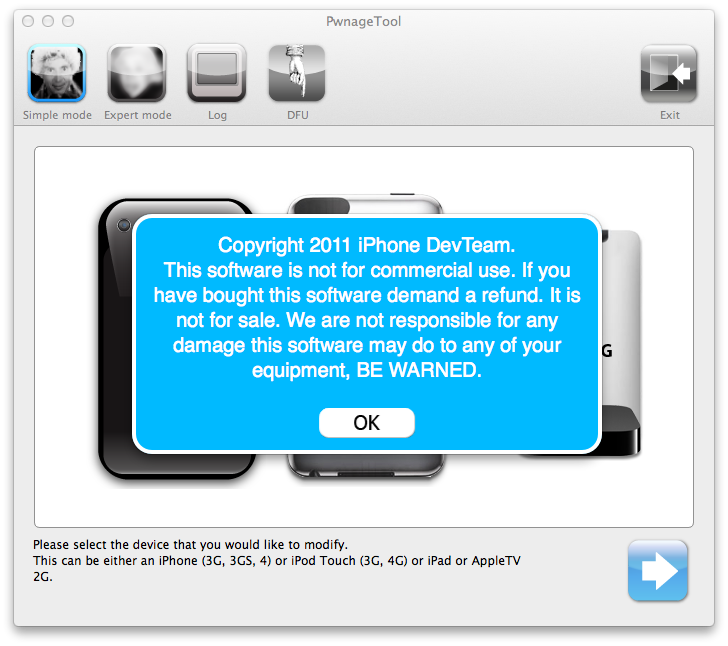 Step Three Click to select Expert Mode from the top menu bar 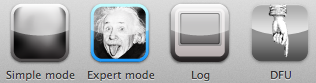 Step Four Click to select your device. A check-mark will appear over the image of the device. Click the blue arrow button to continue. 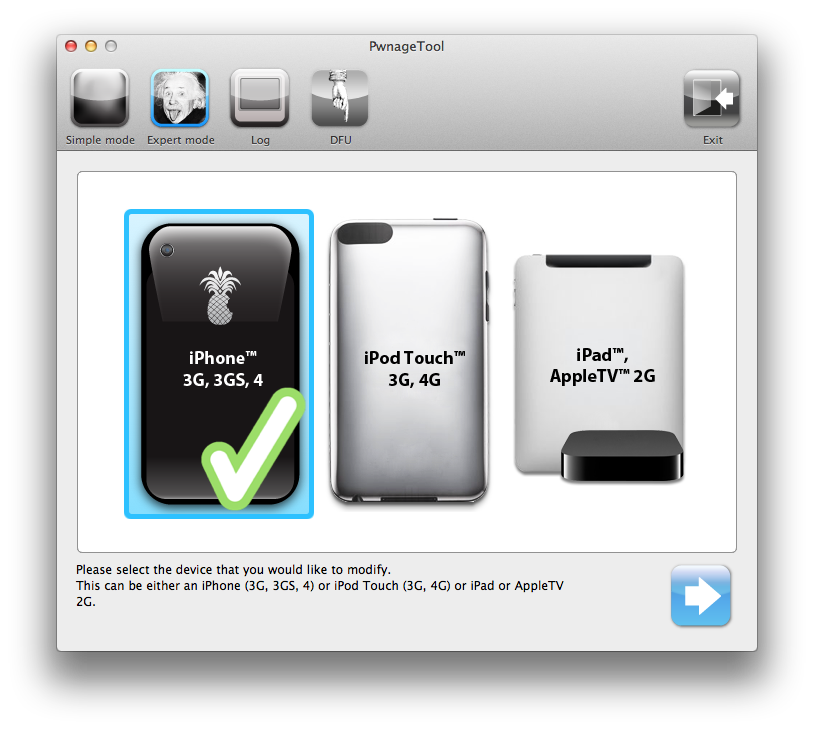 Step Five You will be brought to the "Browse for IPSW" page. Click the Browse for IPSW... button. 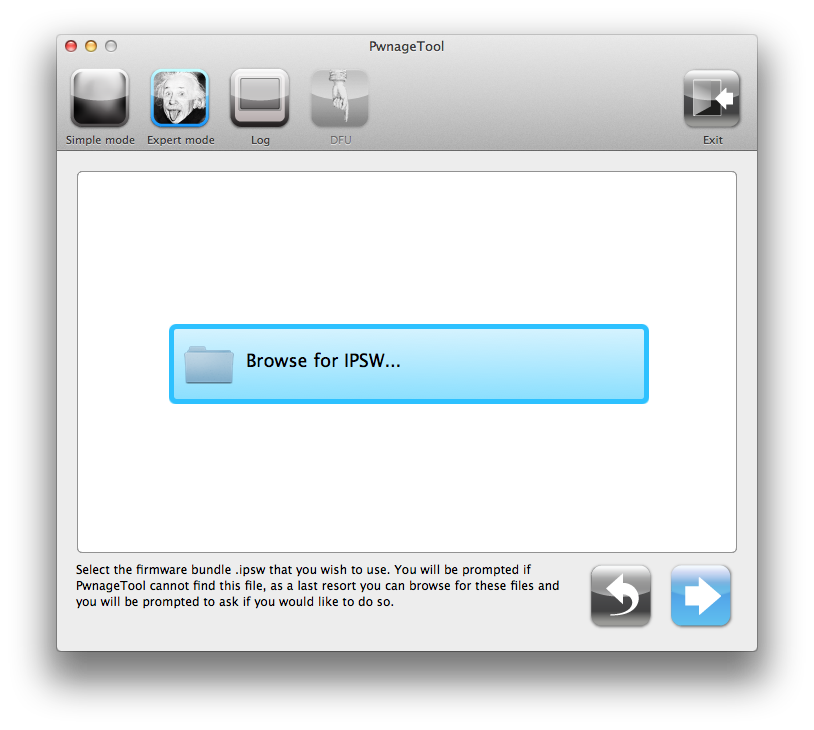 From the popup window select your firmware from the Pwnage folder then click the Open button. 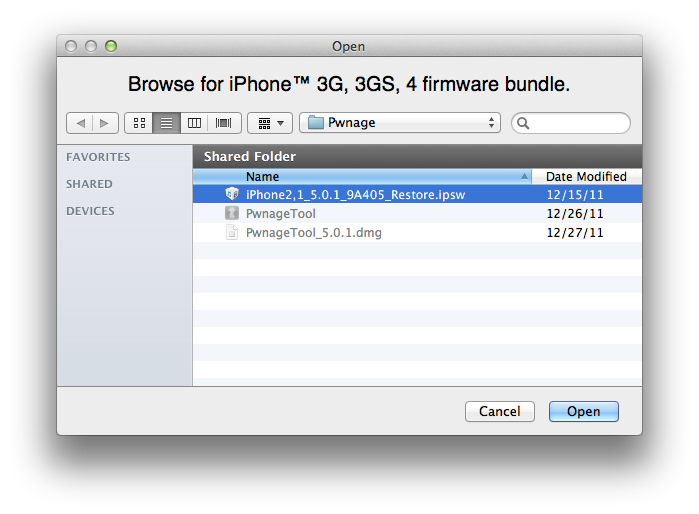 Step Six You will then be brought to a menu with several choices. Click to select General then click the blue arrow button. 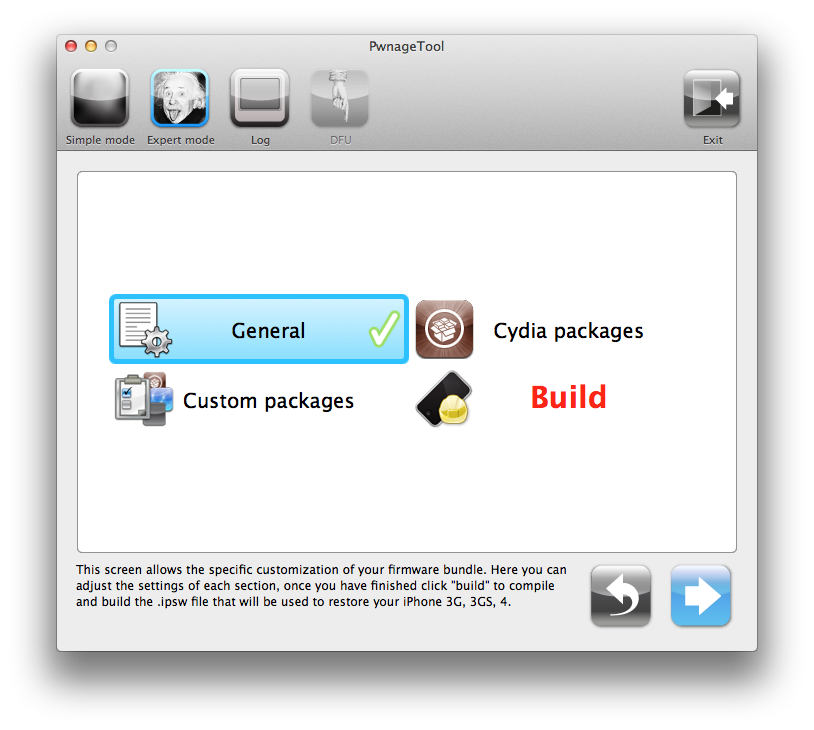 The General settings allows you to decide the partition size. Check Activate the phone if you are not with an official carrier then click the blue arrow button. 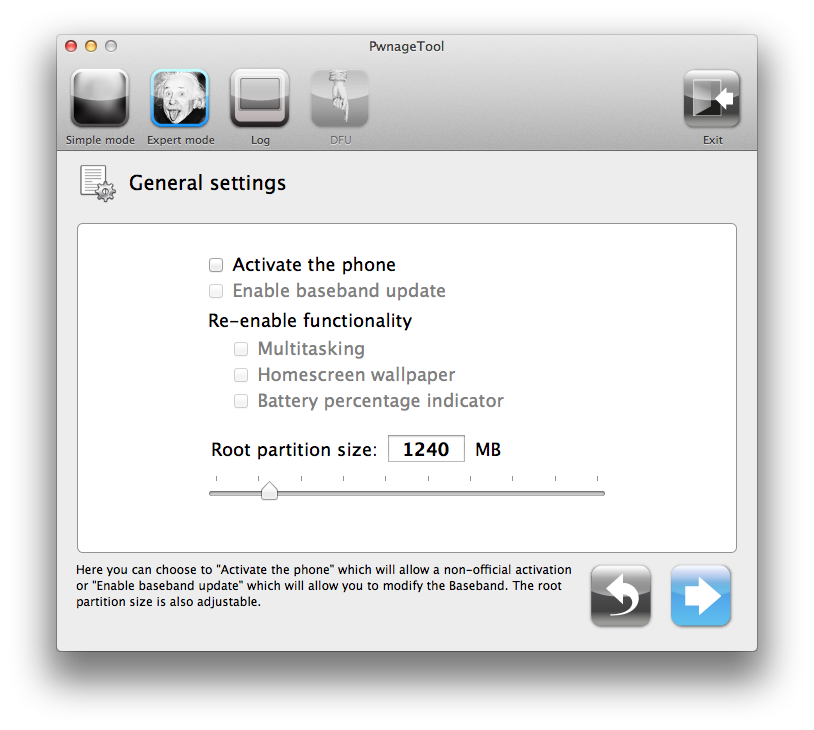 NOTE*: Deselect Activate if you have an iPhone legitimately activated on an official carrier. The Cydia settings menu allows you to create custom packages so you do not have to manually install the necessary them later. 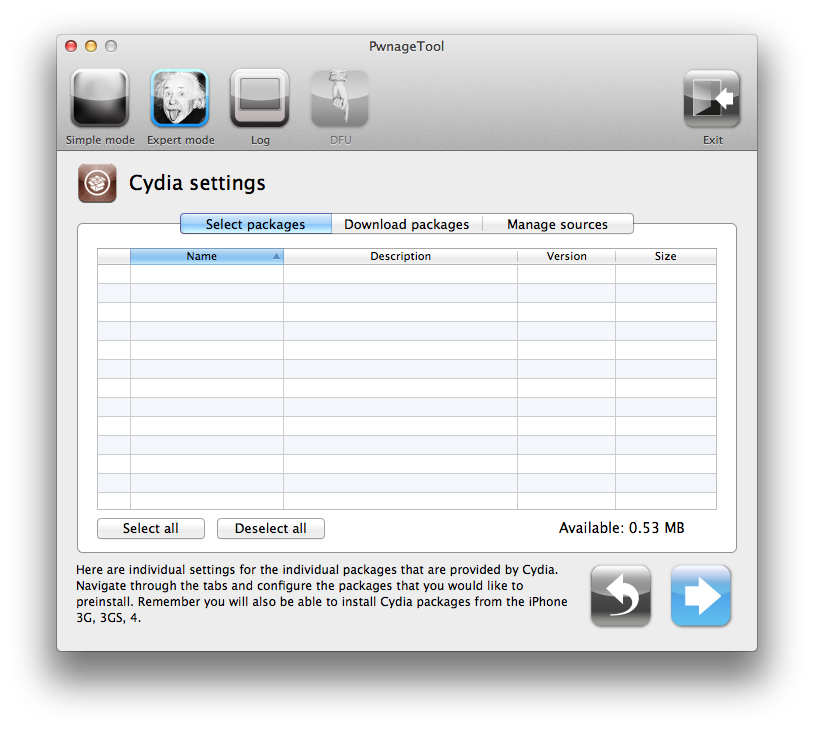 Click to select the Download packages tab. Then click the Refresh button to display all the available packages. Double clicking the package you want will download it and make it available in the Select Packages tab. 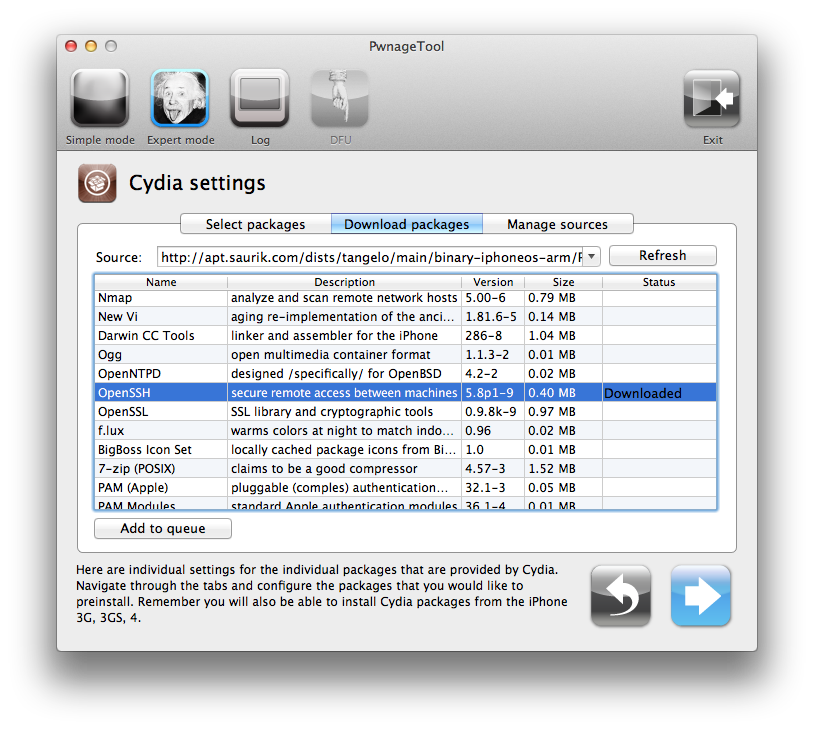 Checkmark the ones you want then click the blue arrow button. 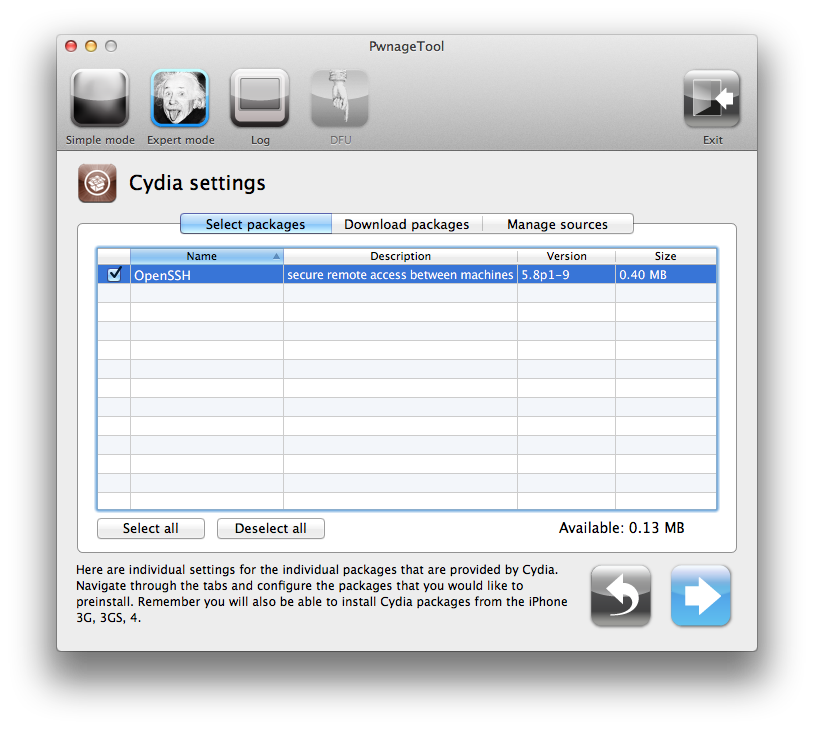 The Custom Packages Settings menu displays listed package settings for your custom IPSW. For know leave these settings as is. Click the blue arrow button to continue. 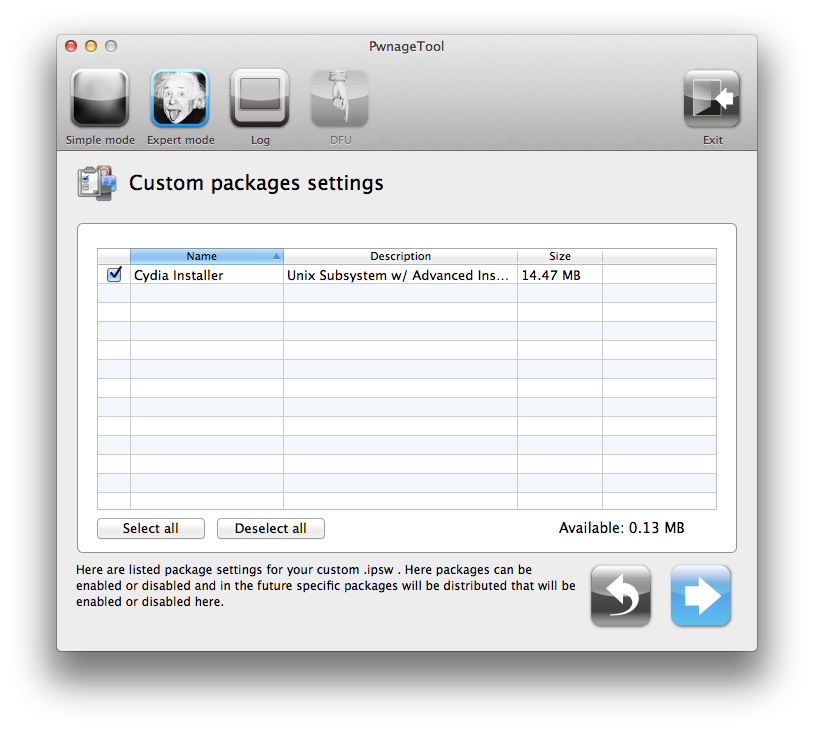 Step Seven You are now ready to begin the pwnage process! Click the Build button to select it then click the Blue arrow button to begin. 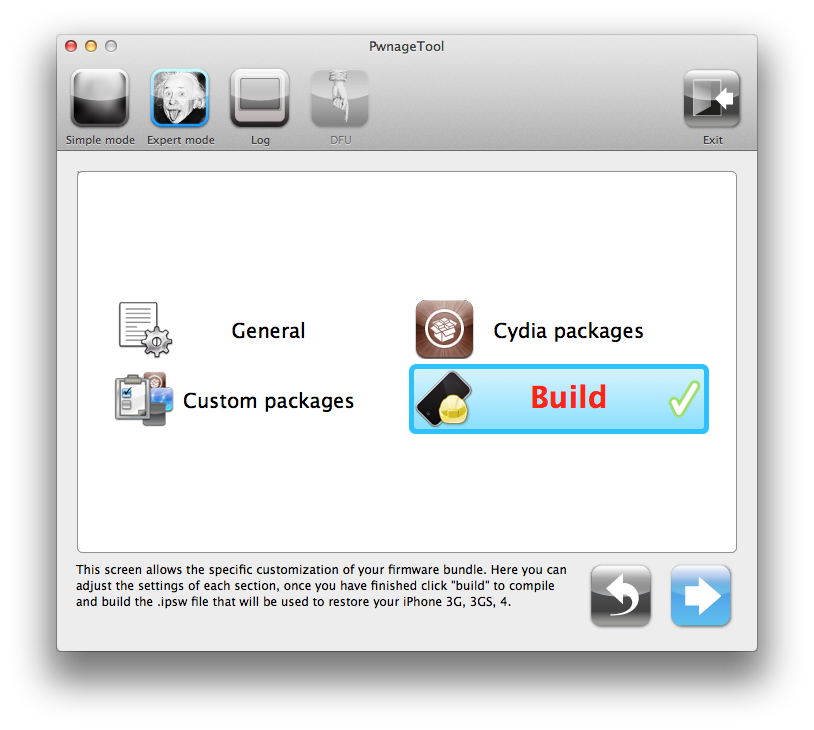 Step Eight You will be asked to save your custom .ipsw file. Save it to your Pwnage folder you created on your Desktop. 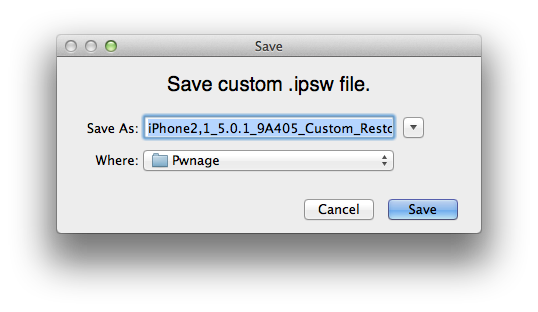 Your IPSW is now being built. Please allow up to 10 minutes. 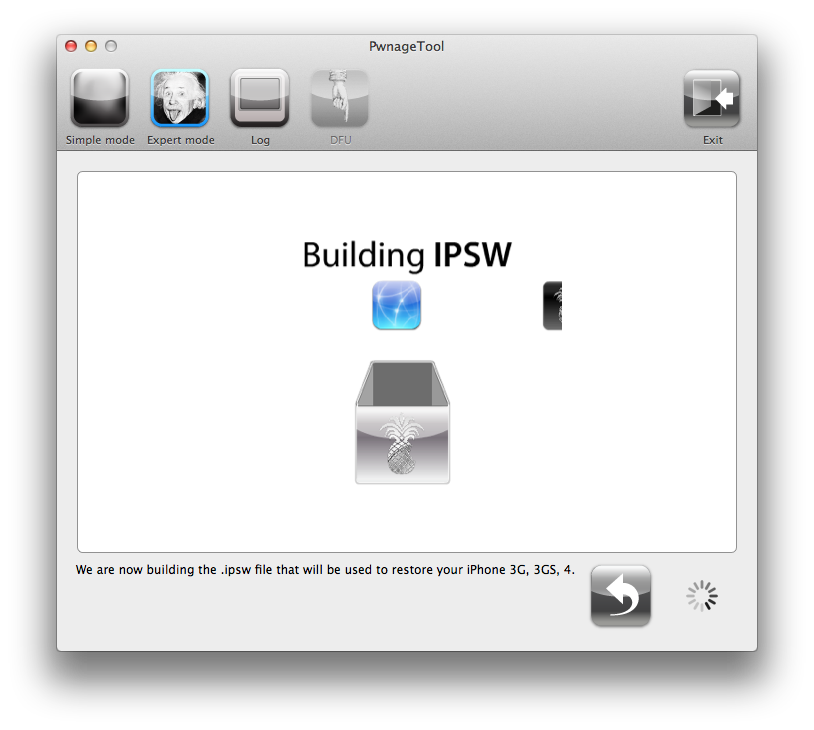 You will be asked to enter your administrator password. Do this then click the OK button. 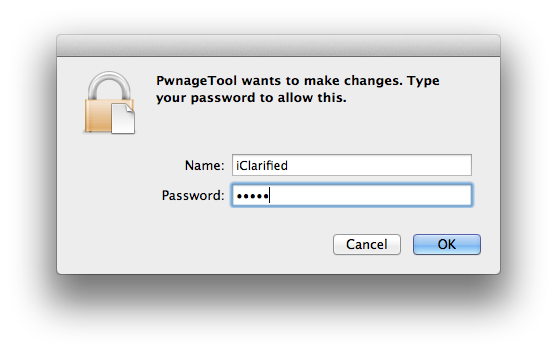 Step Nine Once your ipsw has been built you will be asked to connect your iPhone to the computer. Once it detects your device PwnageTool will guide your through the steps to putting your iPhone into DFU mode. 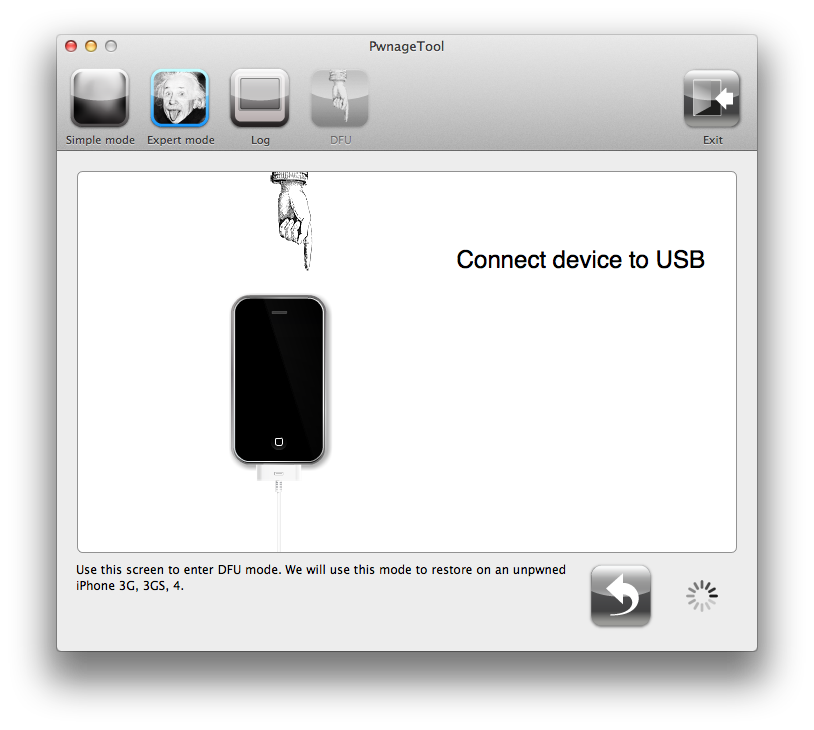 Press and hold the power and home buttons for 10 seconds. 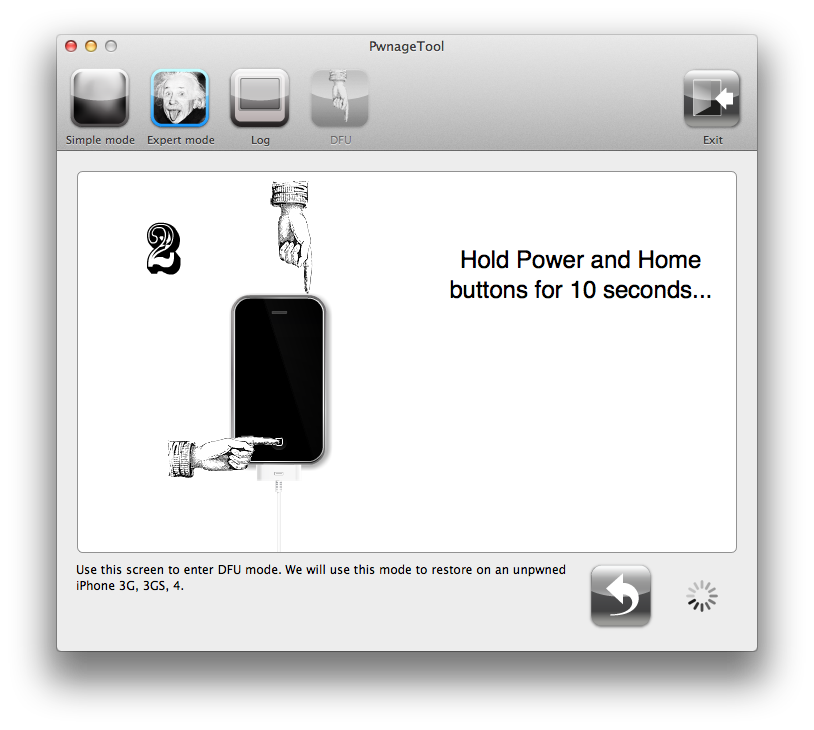 Then release the power button and continue holding the home button for 10 seconds. 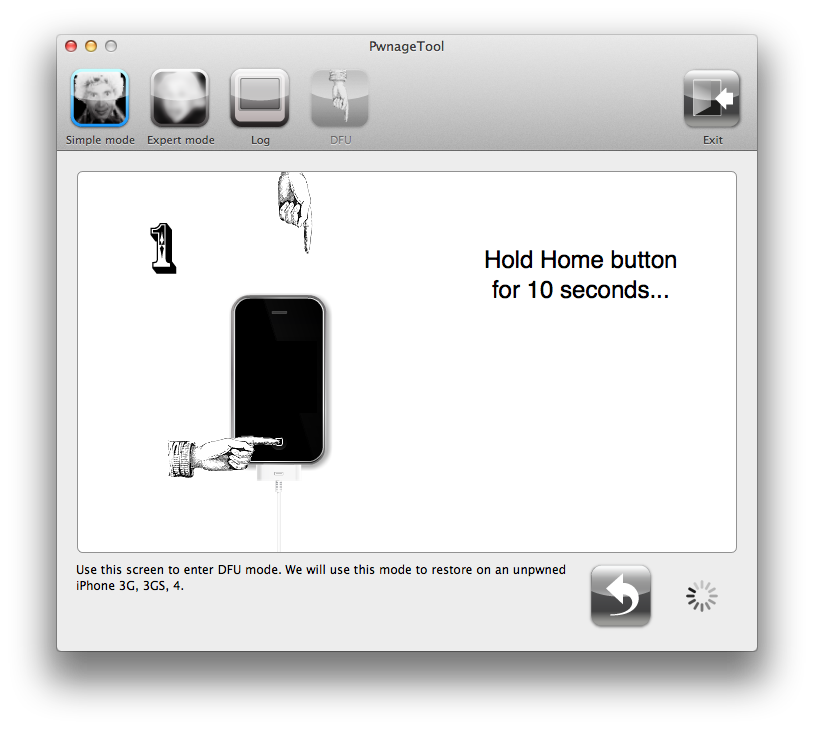 Once your iPhone is successfully in DFU mode, PwnageTool will prompt you to launch iTunes. 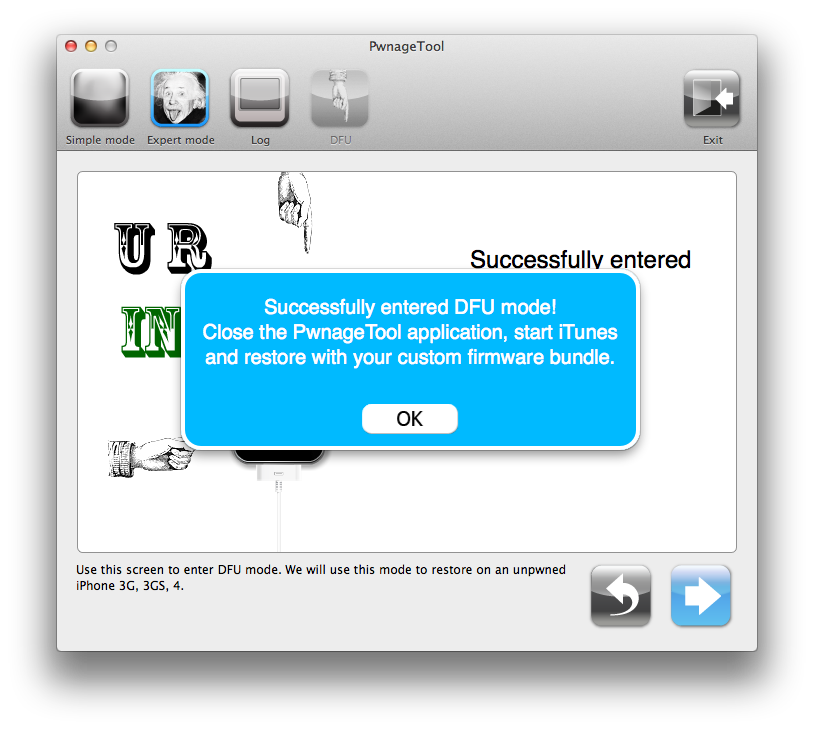 Step Ten Once In iTunes, hold the Alt/Option key and click Restore. 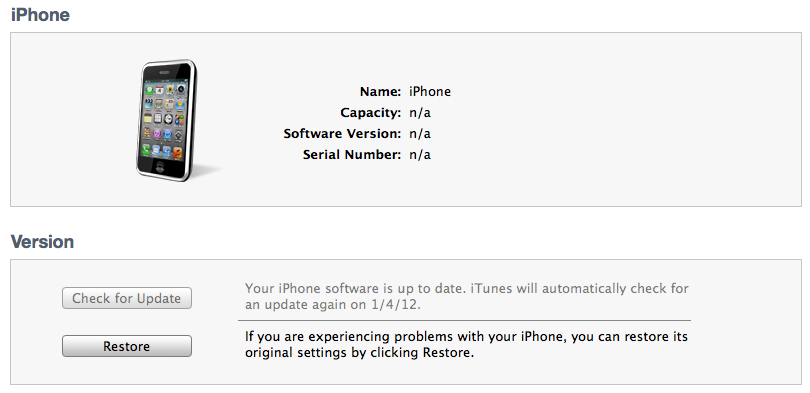 Step Eleven Navigate to the Pwnage folder on your desktop using the dialog window that appears. Select the custom IPSW that was created and click the Choose button. 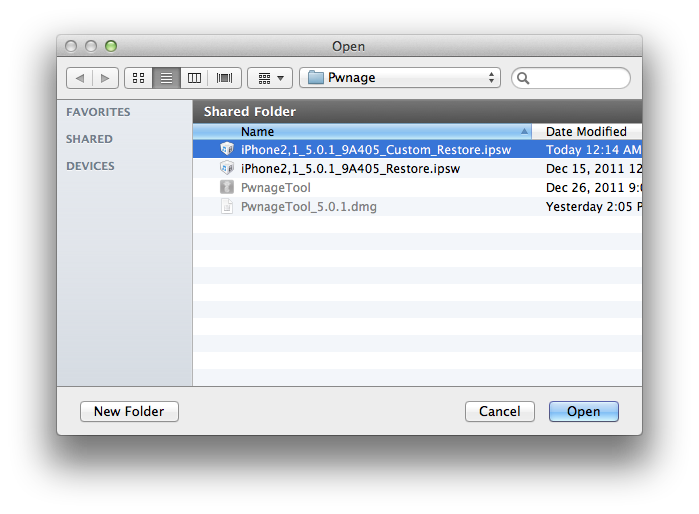 Step Twelve iTunes will now restore the firmware on your iPhone. This can also take up to 10 minutes. Once done you will be rebooted into jailbroken iOS 5.0.1! ***THANKS: Thank you to iPhone Dev-Team, Chronic Dev-Team, I0nic, and Geohot for their hard work in making this jailbreak and tutorial possible! | ||
Showing posts with label apple. Show all posts
Showing posts with label apple. Show all posts
Wednesday, 15 February 2012
How to Jailbreak Your iPhone 3GS Using PwnageTool (Mac) [5.0.1]

How to Untether Your Previously Tethered Jailbreak Using Corona [5.0.1]
| These are instructions on how to untether your previously tethered iOS 5.0.1 jailbreak using Corona. Step One Launch Cydia from your Springboard. 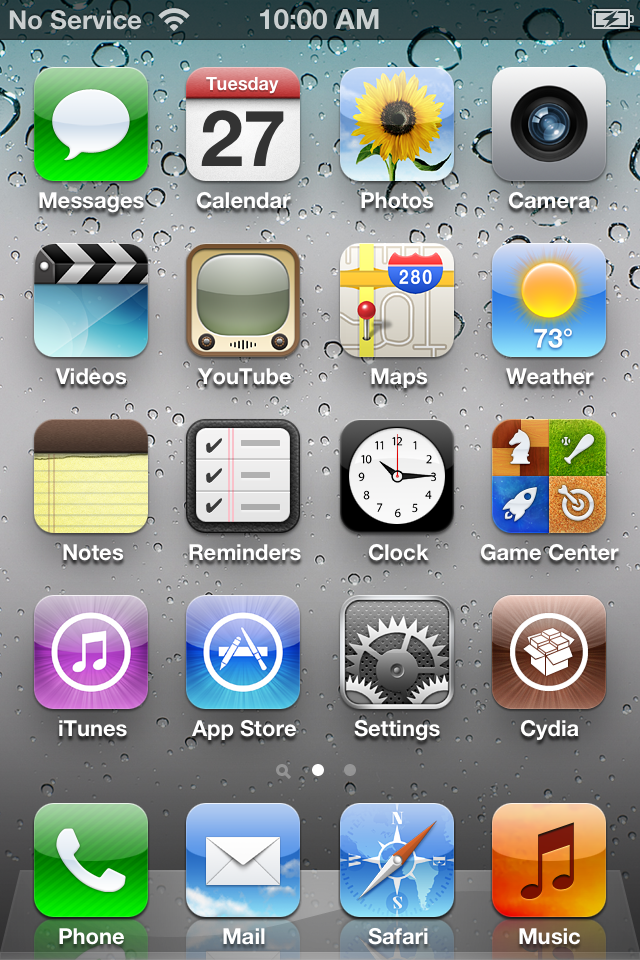 Step Two Select the Search tab at the bottom of the screen. 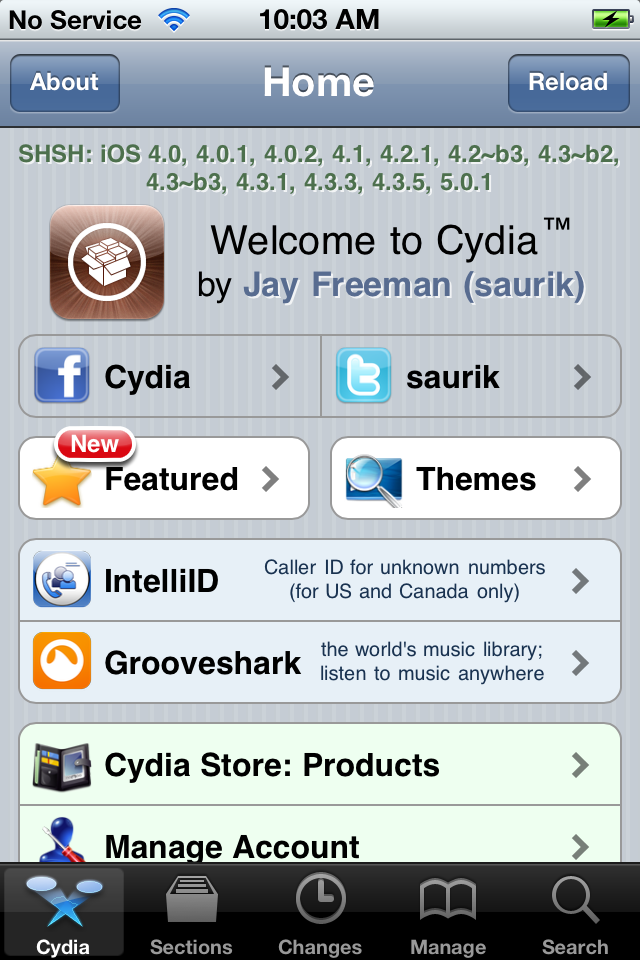 Step Three Type Corona into the search field and press to select the Corona 5.0.1 Untether package once it's found. 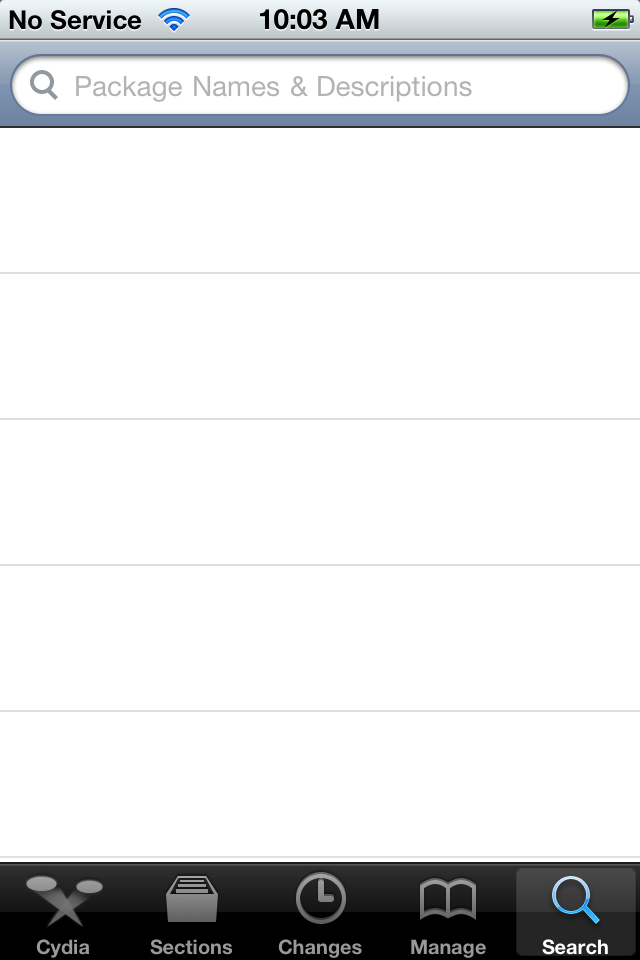 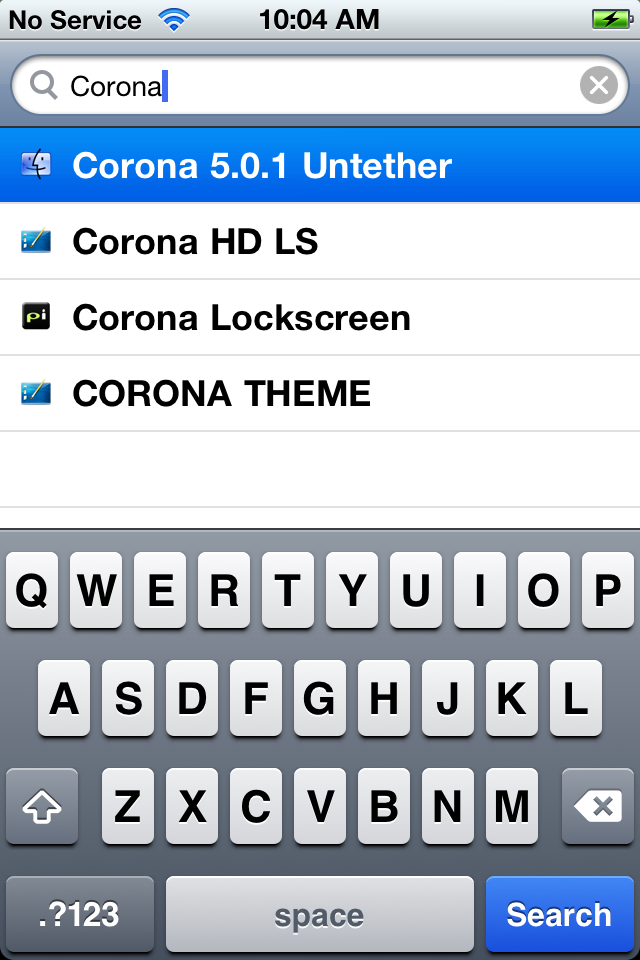 Step Four Press the Install button at the top right of the screen. 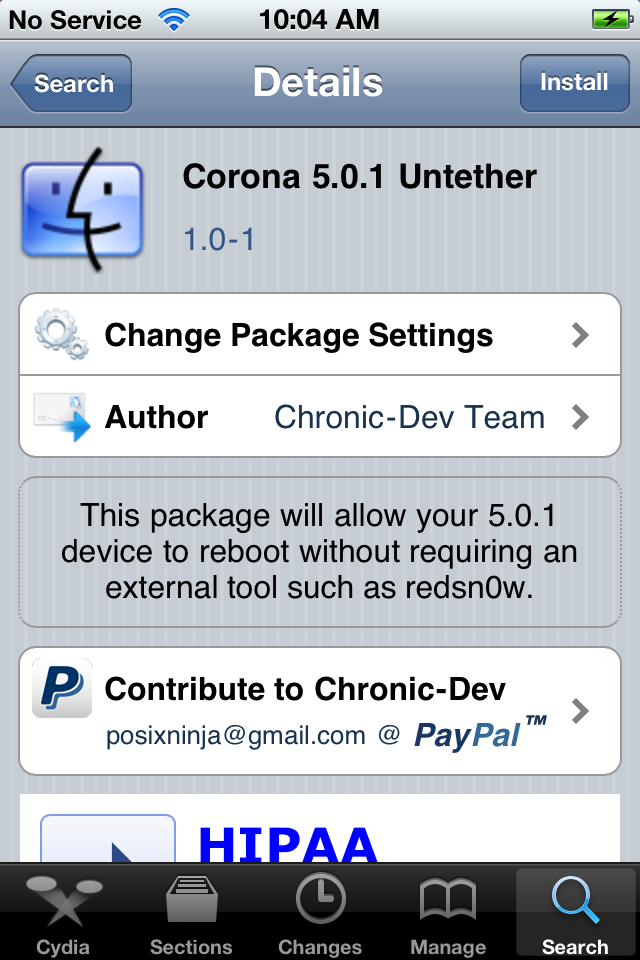 Step Five Press the Confirm button to begin installation. 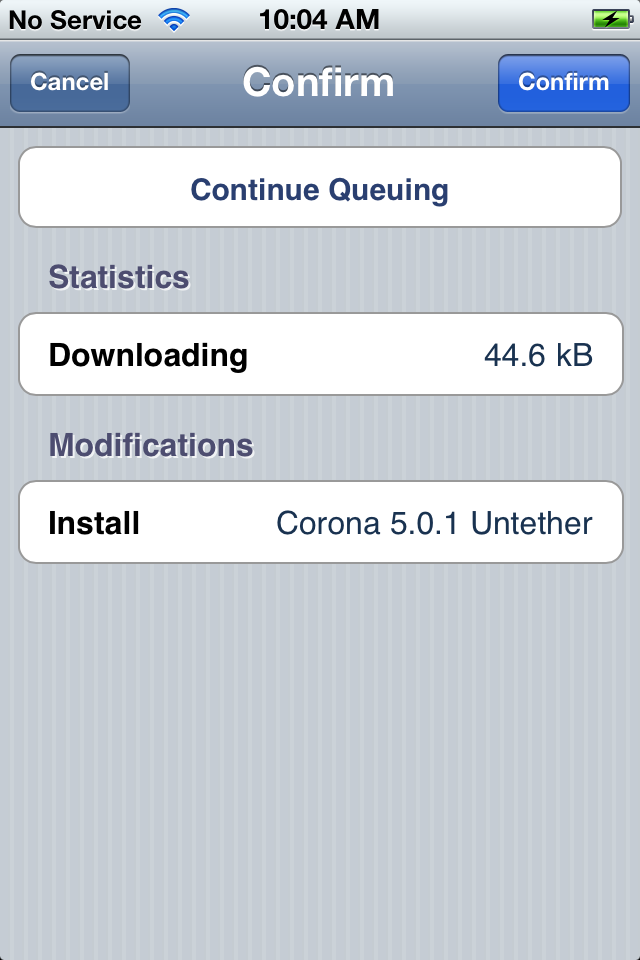 Step Six Once installation has completed successfully you can press the large Return to Cydia button. 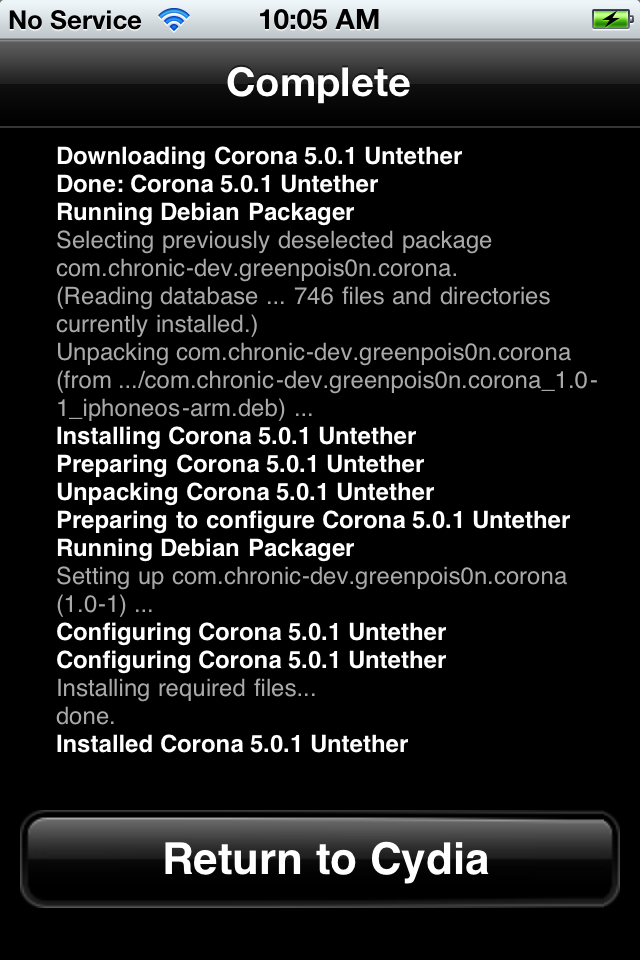 Step Seven You can now reboot your device with an untethered jailbreak! *Thanks to the Chronic Dev-Team and pod2g for making this package available! | ||
Untether Your Tethered iOS 5.0.1 Jailbreak With Corona
| The Chronic Dev-Team has announced the release of Corona, a Cydia package to untether your tethered iOS 5.0.1 jailbreak. This package will allow your 5.0.1 device to install pod2g's untethered exploits and reboot without requiring an external tool like redsn0w or sn0wbreeze, and without having to restore your device (so you get to keep all your apps, contacts, etc). To install Corona, simply launch Cydia, search for Corona, and press the Install button. You can find more detailed instructions here. If you do not have a tethered jailbreak already or prefer a clean install you can use the newly released version of RedSn0w to perform an untethered jailbreak of your device. Read More 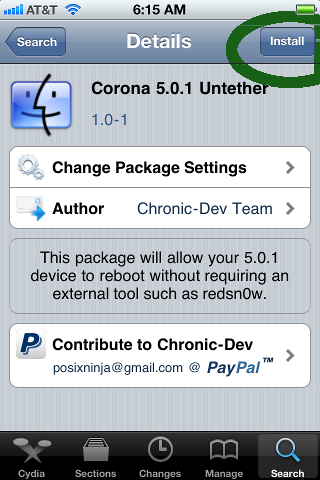 | ||
Where To Download iPhone Firmware Files From
Below you can find the direct links to the iPhone Firmware Files for every released firmware version. Please note that if you use Safari you must disable the auto unzip feature. It may be easier to just use Firefox!
1.0.0: iPhone1,1_1.0_1A543a_Restore.ipsw
1.0.1: iPhone1,1_1.0.1_1C25_Restore.ipsw
1.0.2: iPhone1,1_1.0.2_1C28_Restore.ipsw
1.1.1: iPhone1,1_1.1.1_3A109a_Restore.ipsw
1.1.2: iPhone1,1_1.1.2_3B48b_Restore.ipsw
1.1.3: iPhone1,1_1.1.3_4A93_Restore.ipsw
1.1.4: iPhone1,1_1.1.4_4A102_Restore.ipsw
2.0.0 (2G): iPhone1,1_2.0_5A347_Restore.ipsw
2.0.0 (3G): iPhone1,2_2.0_5A347_Restore.ipsw
2.0.1 (2G): iPhone1,1_2.0.1_5B108_Restore.ipsw
2.0.1 (3G): iPhone1,2_2.0.1_5B108_Restore.ipsw
2.0.2 (2G): iPhone1,1_2.0.2_5C1_Restore.ipsw
2.0.2 (3G): iPhone1,2_2.0.2_5C1_Restore.ipsw
2.1.0 (2G): iPhone1,1_2.1_5F136_Restore.ipsw
2.1.0 (3G): iPhone1,2_2.1_5F136_Restore.ipsw
2.2.0 (2G): iPhone1,1_2.2_5G77_Restore.ipsw
2.2.0 (3G): iPhone1,2_2.2_5G77_Restore.ipsw
2.2.1 (2G): iPhone1,1_2.2.1_5H1_Restore.ipsw
2.2.1 (3G): iPhone1,2_2.2.1_5H11_Restore.ipsw
3.0.0 (2G): iPhone1,1_3.0_7A341_Restore.ipsw
3.0.0 (3G): iPhone1,2_3.0_7A341_Restore.ipsw
3.0.0 (3GS): iPhone2,1_3.0_7A341_Restore.ipsw
3.0.1 (2G): iPhone1,1_3.0.1_7A400_Restore.ipsw
3.0.1 (3G): iPhone1,2_3.0.1_7A400_Restore.ipsw
3.0.1 (3GS): iPhone2,1_3.0.1_7A400_Restore.ipsw
3.1.0 (2G): iPhone1,1_3.1_7C144_Restore.ipsw
3.1.0 (3G): iPhone1,2_3.1_7C144_Restore.ipsw
3.1.0 (3GS): iPhone2,1_3.1_7C144_Restore.ipsw
3.1.2 (2G): iPhone1,1_3.1.2_7D11_Restore.ipsw
3.1.2 (3G): iPhone1,2_3.1.2_7D11_Restore.ipsw
3.1.2 (3GS): iPhone2,1_3.1.2_7D11_Restore.ipsw
3.1.3 (2G): iPhone1,1_3.1.3_7E18_Restore.ipsw
3.1.3 (3G): iPhone1,2_3.1.3_7E18_Restore.ipsw
3.1.3 (3GS): iPhone2,1_3.1.3_7E18_Restore.ipsw
4.0.0 (3G): iPhone1,2_4.0_8A293_Restore.ipsw
4.0.0 (3GS): iPhone2,1_4.0_8A293_Restore.ipsw
4.0.0 (4): iPhone3,1_4.0_8A293_Restore.ipsw
4.0.1 (3G): iPhone1,2_4.0.1_8A306_Restore.ipsw
4.0.1 (3GS): iPhone2,1_4.0.1_8A306_Restore.ipsw
4.0.1 (4): iPhone3,1_4.0.1_8A306_Restore.ipsw
4.0.2 (3G): iPhone1,2_4.0.2_8A400_Restore.ipsw
4.0.2 (3GS): iPhone2,1_4.0.2_8A400_Restore.ipsw
4.0.2 (4): iPhone3,1_4.0.2_8A400_Restore.ipsw
4.1.0 (3G): iPhone1,2_4.1_8B117_Restore.ipsw
4.1.0 (3GS): iPhone2,1_4.1_8B117_Restore.ipsw
4.1.0 (4): iPhone3,1_4.1_8B117_Restore.ipsw
4.2.1 (3G): iPhone1,2_4.2.1_8C148_Restore.ipsw
4.2.1 (3GS): iPhone2,1_4.2.1_8C148a_Restore.ipsw
4.2.1 (4): iPhone3,1_4.2.1_8C148_Restore.ipsw
4.2.6 (4 CDMA): iPhone3,3_4.2.10_8E600_Restore.ipsw
4.3.0 (3GS): iPhone2,1_4.3_8F190_Restore.ipsw
4.3.0 (4 GSM): iPhone3,1_4.3_8F190_Restore.ipsw
4.3.1 (3GS): iPhone2,1_4.3.1_8G4_Restore.ipsw
4.3.1 (4 GSM): iPhone3,1_4.3.1_8G4_Restore.ipsw
4.3.2 (3GS): iPhone2,1_4.3.2_8H7_Restore.ipsw
4.3.2 (4 GSM): iPhone3,1_4.3.2_8H7_Restore.ipsw
4.2.7 (4 CDMA): iPhone3,3_4.2.7_8E303_Restore.ipsw
4.2.8 (4 CDMA): iPhone3,3_4.2.8_8E401_Restore.ipsw
4.3.3 (3GS): iPhone2,1_4.3.3_8J2_Restore.ipsw
4.3.3 (4 GSM): iPhone3,1_4.3.3_8J2_Restore.ipsw
4.2.9 (4 CDMA): iPhone3,3_4.2.9_8E501_Restore.ipsw
4.3.4 (3GS): iPhone2,1_4.3.4_8K2_Restore.ipsw
4.3.4 (4 GSM): iPhone3,1_4.3.4_8K2_Restore.ipsw
4.2.10 (4 CDMA): iPhone3,3_4.2.10_8E600_Restore.ipsw
4.3.5 (3GS): iPhone2,1_4.3.5_8L1_Restore.ipsw
4.3.5 (4 GSM): iPhone3,1_4.3.5_8L1_Restore.ipsw
5.0 (3GS): iPhone2,1_5.0_9A334_Restore.ipsw
5.0 (4 GSM): iPhone3,1_5.0_9A334_Restore.ipsw
5.0 (4 CDMA): iPhone3,3_5.0_9A334_Restore.ipsw
5.0 (4S): iPhone4,1_5.0_9A334_Restore.ipsw
5.0.1 (3GS): iPhone2,1_5.0.1_9A405_Restore.ipsw
5.0.1 (4 GSM): iPhone3,1_5.0.1_9A405_Restore.ipsw
5.0.1 (4 CDMA): iPhone3,3_5.0.1_9A405_Restore.ipsw
5.0.1 (4S): iPhone4,1_5.0.1_9A405_Restore.ipsw
5.0.1 (4S) [9A406]: iPhone4,1_5.0.1_9A406_Restore.ipsw
NOTE*: I will update this as new firmware versions come out of course :)
Tuesday, 14 February 2012
How to Save Your iPad SHSH Blobs Using RedSnow (Mac)
| These are instructions on how to backup and save your SHSH Blobs to Cydia using RedSn0w for Mac. For instructions on how to backup and save your SHSH Blobs to Cydia using RedSn0w for Windows click here Step One Create a folder on your desktop called Pwnage Download RedSn0w from 0.9.9b1 here and place it in the Pwnage folder. Extract the RedSn0w zip file by double clicking it. 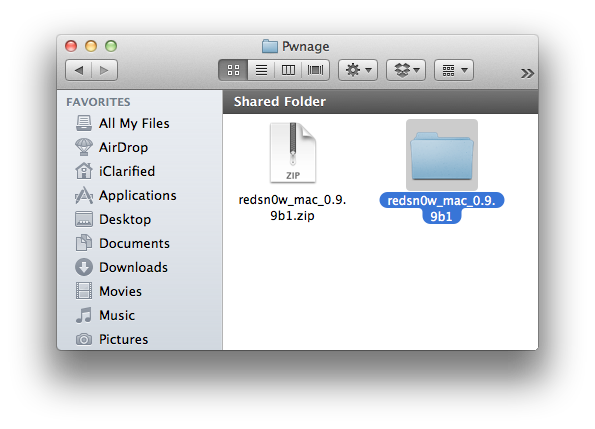 Step Two Launch the redsn0w application from the redsn0w folder we just extracted.  Step Three Once RedSn0w opens click the Extras button 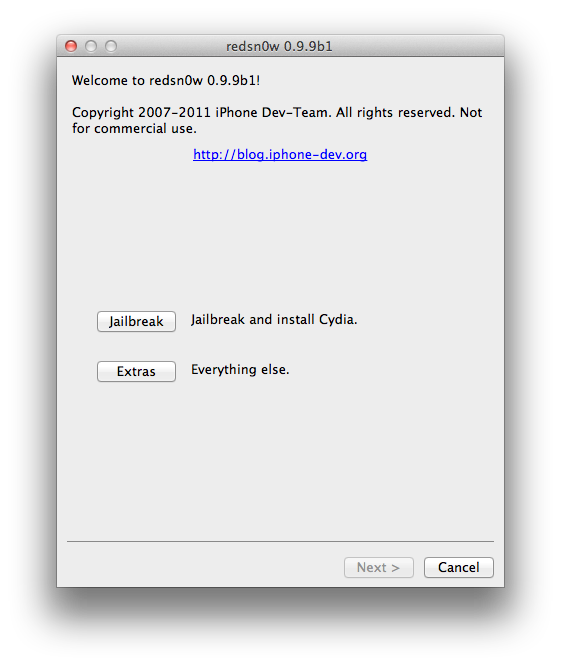 Step Four Click the SHSH blobs button from the Extras menu. 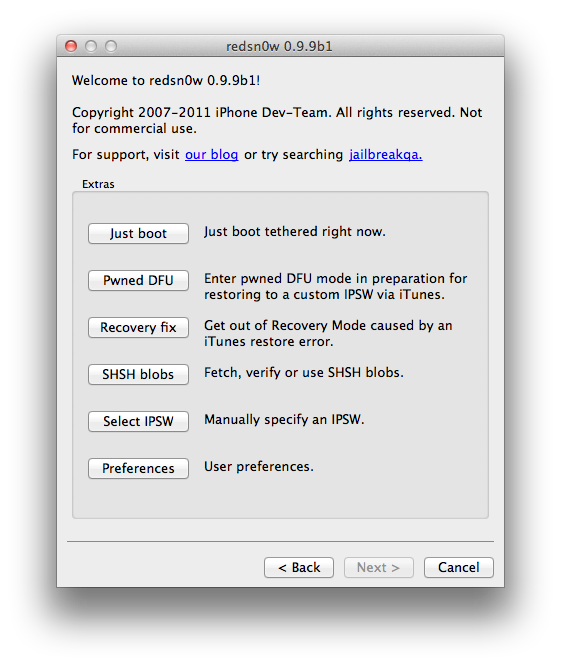 Step Five Click the Fetch button to fetch the SHSH blobs on your device and send them to the Cydia server for storage. 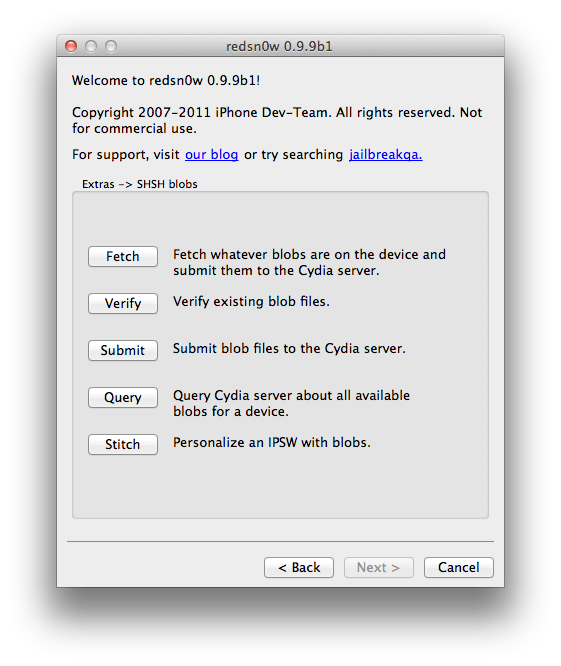 Step Six Please plug your iPad into the computer and make sure its OFF then click the Next button 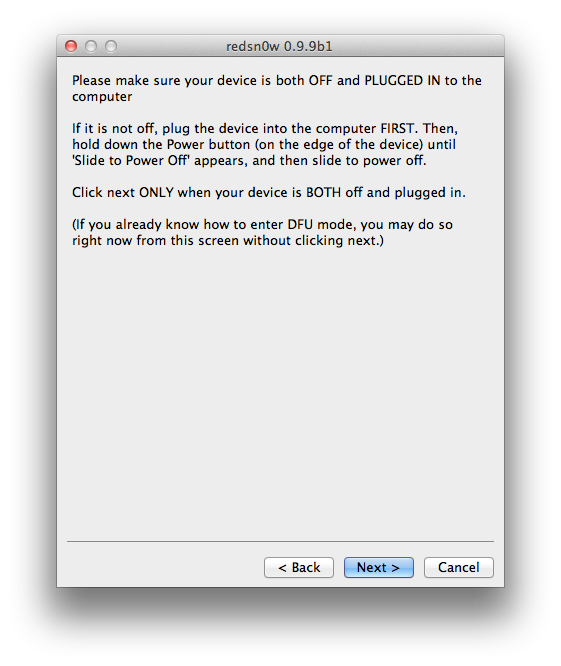 Step Seven RedSn0w will now guide you through the steps to get into DFU mode. You can find more help with DFU mode here 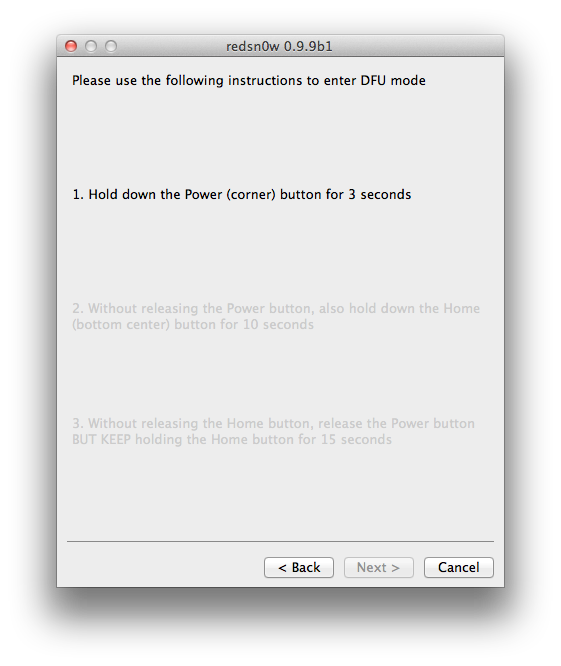 Hold down both the Home button and the Power button for 10 seconds. 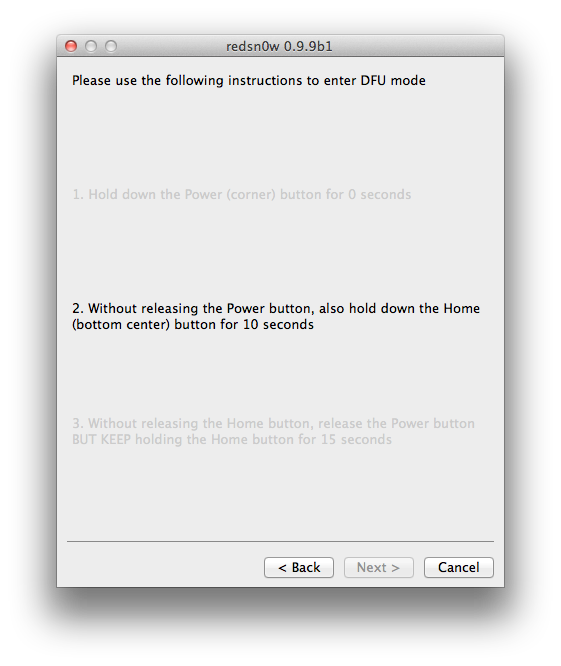 Release the Power button and continue holding the Home button until RedSn0w detects the device. 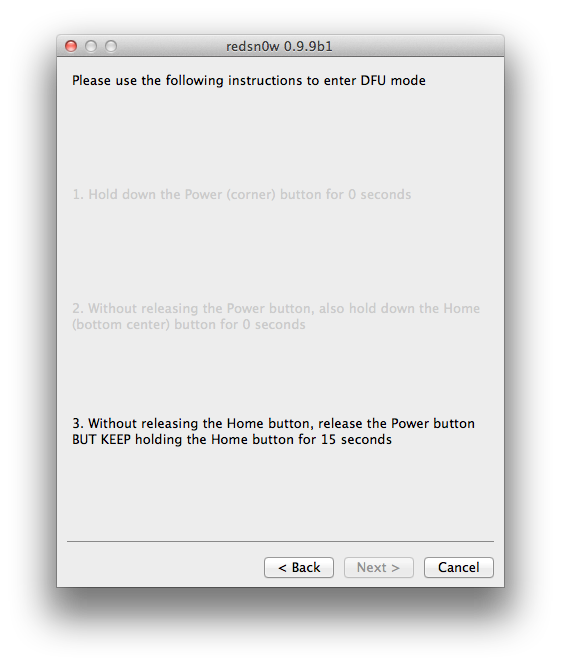 Step Eight Your iPad will now reboot 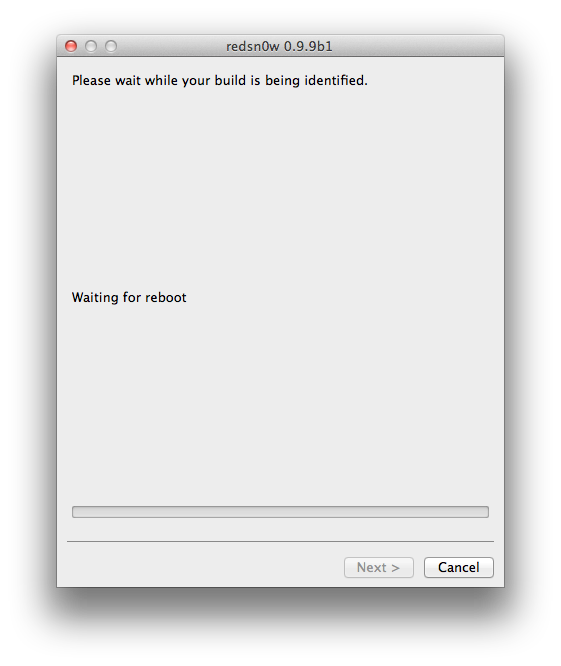 Step Nine RedSn0w will then begin fetch the SHSH blobs from your device and submit them to Cydia. 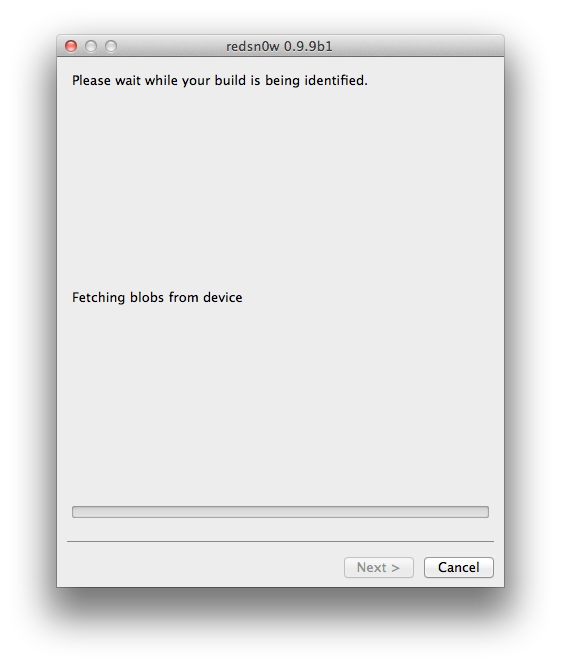 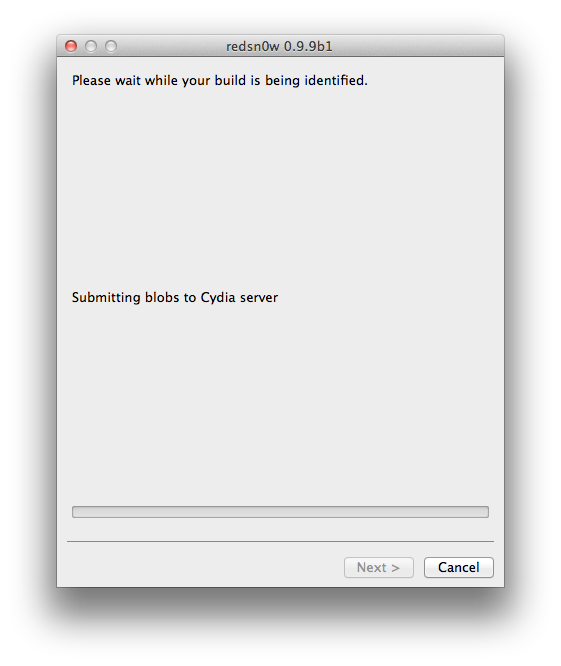 Step Ten Once this is complete you will be notified that your submission was a success. Click the Back button to return to RedSn0w. 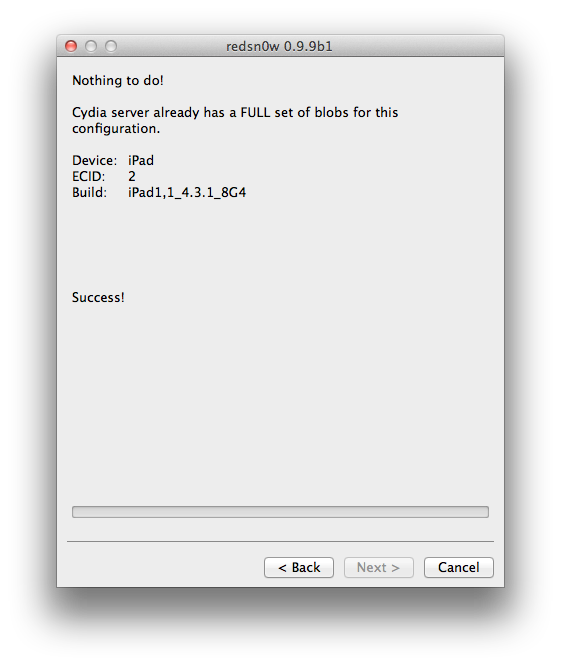 Step Eleven Click the SHSH blobs button and then click the Query button to make sure Cydia has your blobs saved. 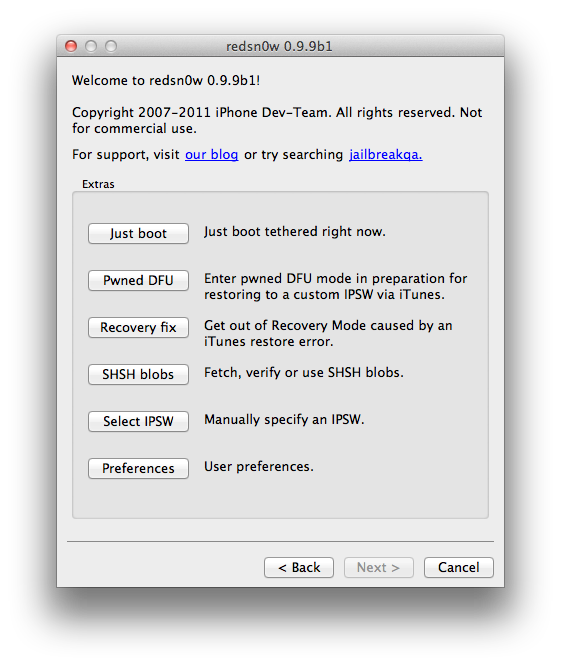 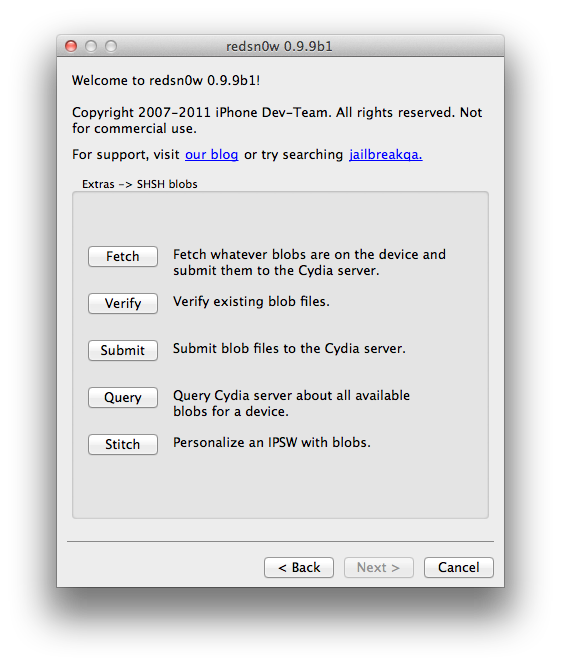 Step Twelve Enter * into the ECID textfield and click OK to check all your devices. 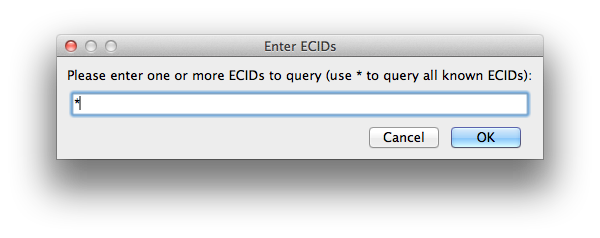 Step Thirteen RedSn0w will now query Cydia and display the list of stored blobs. 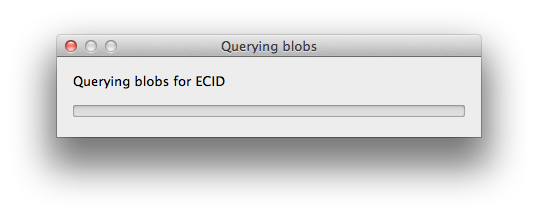 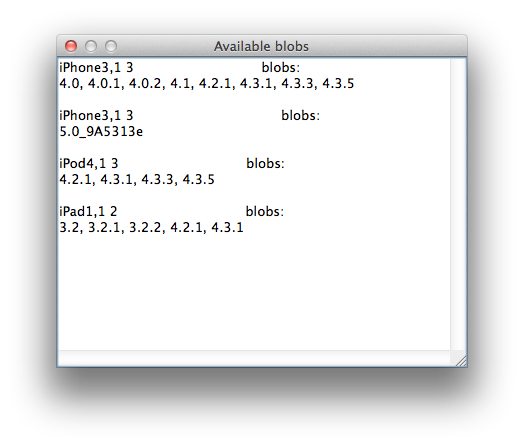 Important: RedSn0w also saves your blobs in a plist located within the RedSn0w folder. We would recommend keeping these for added safety. 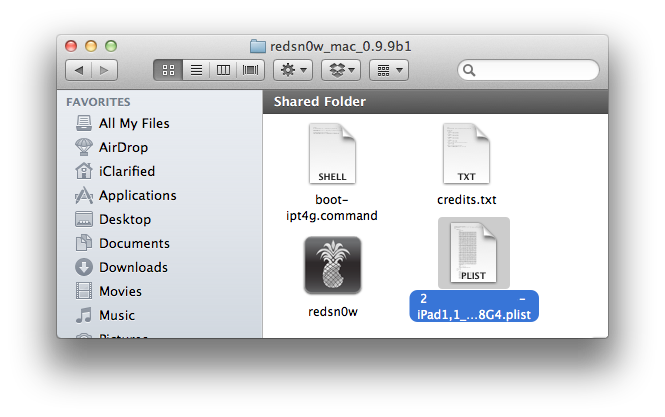 | ||
Subscribe to:
Posts (Atom)